How do I Test my Vote Process?
Steps to Test Your Election Process:
1) Turn On Test Mode
From the Dashboard, on the top right hand side is a button that displays the current Testing Mode status.Here, we turned Testing Mode On by clicking the Test Mode Off toggle button.

The orange Test Mode Warning Bar appears when testing mode is active, displaying a message that any test votes or ballots cast will be deleted.
Wherever you go in the Voting Manager (VM), the orange test bar will display to let you know that Testing Mode is still on.

2 ) Login to the Voting Site
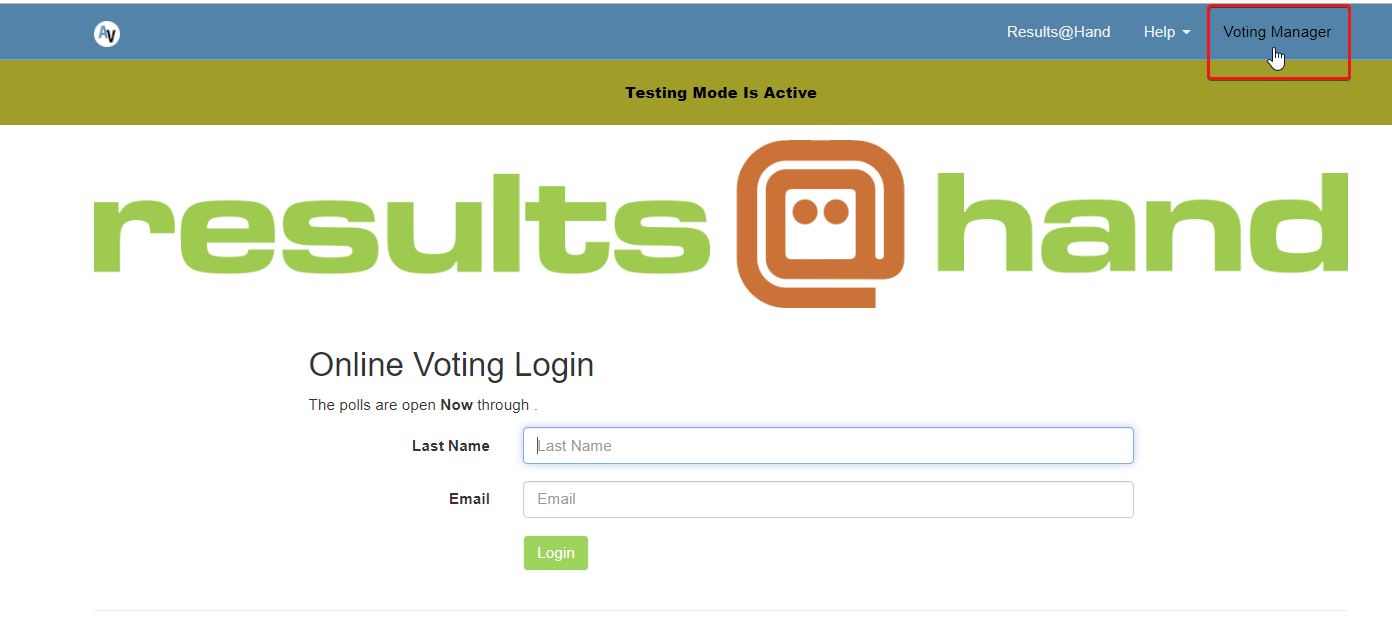
Go to the Voting Site via the link on the header navigation bar.

While testing mode is on, your election pages will display the ‘Test Mode Is Active’ warning bar.
Log in as one of the voters from your voting member list and vote. If you have groups enabled in your election, test the process as a voter from each of your groups. Go through the voting process and finish by casting your ballot. Continue this process until you are satisfied with your testing. See below .pdf link for voter process. Don't worry, the ballots you cast as live voters are removed when you exit Testing Mode.
https://www.associationvoting.com/user_files/voterprocess.pdf
Note: NO Voter emails will be sent to live voters while in testing mode. The voting receipt email will be emailed only to the administrator during testing.
3) Turn Off Testing Mode:
Once you are done testing, go back into the VM to exit Testing Mode.
In order to turn it off, you will need to go back to the Dashboard page. You can find this at the top of the right side Navigation Bar.

Click the Testing Mode button to turn it off.
The testing mode warning bar disappears from both the voting site and the VM site after turning the testing mode off. You will notice that all votes cast during the test were removed. Any votes or ballots cast that were entered before you went into testing mode, will still show up under results.
Note: The testing mode will only allow a test voter to vote once. Simply toggle testing mode off and on to clear all votes and be able to vote again.
Testing with Email Announcements
Step 1) Once testing mode is turned on, you will see an orange bar across the top of the screen indicating that testing mode is ON. You can then go to your Election site (tap the Voting Site llink on the top navigation next to HELP)and walk through the process. It is important to remember to turn test mode OFF when you are finished as that will clear the test votes and prepare the election to go live.
Step 2) Schedule your announcement in the Email Campaigns section for your election start date. For help on creating and scheduling email, search for "Email Announcement Instrucitons" in the HELP section or watch this video https://youtu.be/g8YnHFP8XAE
Step 3) Go to Email Announcements > Browse Campaigns. This will take you to the screen that lists your email campaigns. Choose the one you would like to test and click the “Edit” button. Navigate to the “Preview/Test” step by clicking the blue dot under “Preview/Test” in the top navigation. See the image below:

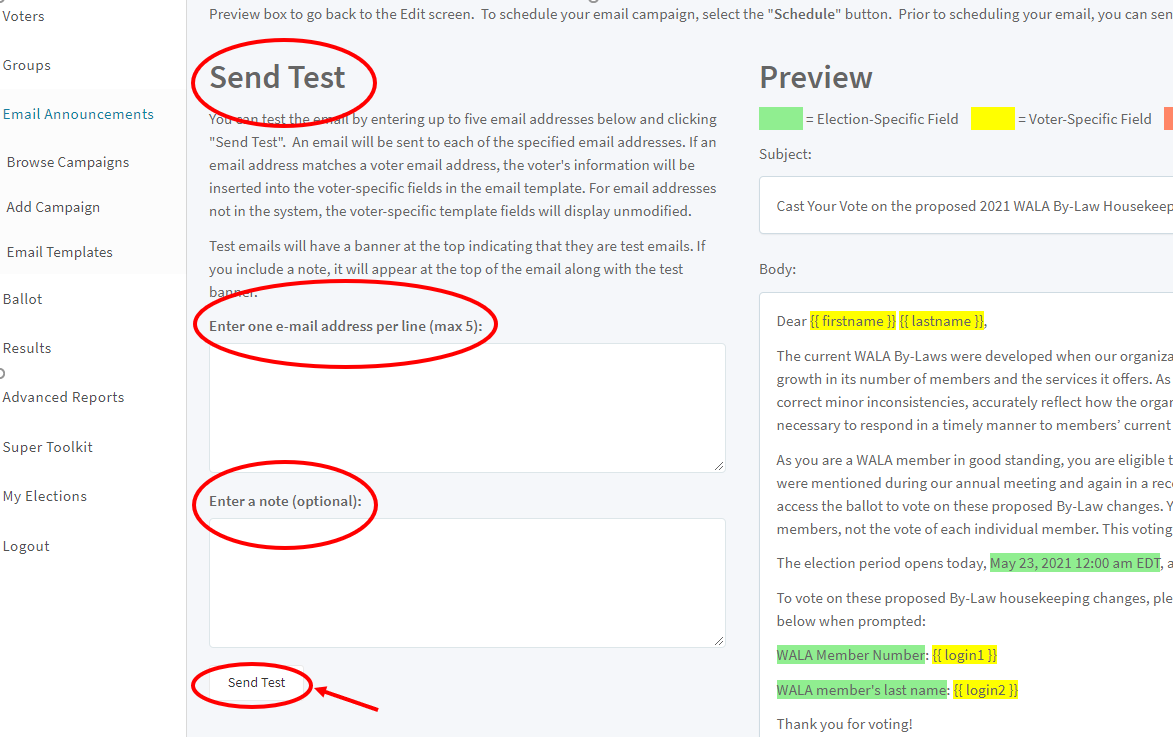
Step 4) On the Preview/Test screen, you can enter your email address (or any others you want to send a test to) and a note if desired. Click the Send Test button, and the system will send the email to you. See image below:

NOTE: For the recipient to receive login credentials in the email, which are needed to test the vote process, the recipient must be a voter in the the database (thus listed in the Voter > browse section).
Related Articles
What do I do if my election started but I forgot to turn test mode off?
If you have forgotten to turn test mode off and voters have already cast ballots, please contact us at support@associationvoting.com to assist you. Why can't I just turn test mode off if my election has already started? When test mode is turned off, ...Can voters cast different vote counts?
Yes, you can allocate voting weights or counts to each voter. For example Kim can cast a vote worth 5 votes, while Sue can only cast a vote worth 1. While multipe votes can be assigned to any one voter, the VOTER MAY NOT SPLIT THEIR VOTE regardless ...How Do I Add a Paper Ballot to Results?
This is a feature of a hybrid election. When the voter sends in a paper ballot, the result needs to be documented. The admin can add the result in one of two ways. From the Voting Manager side navigation, click on HYBRID ENTRY > BALLOT ENTRY. Type in ...What is a Group Vote Weight & how is weighted voting set?
Video Instruction: Help with Groups Weighted voting is an electoral system in which not all voters have the same amount of influence over the outcome of an election. Instead, votes of different voters are given different weight. Click on VOTERS > ...How can I hide or skip the Welcome Screen so my voters can go straight to the ballot to vote after login?
You can remove the Welcome screen step in the voting process if you'd like. Welcome Screen: To bypass the above Welcome screen, simply goto Ballot > Settings, click the Appearance tab, and scroll down to the bottom of the settings list. Change the ...